
In the first part of this blog series, we explored the basics of Apache Airflow, a powerful open-source tool designed to manage and orchestrate complex business workflows. Airflow allows users to define, schedule, and monitor workflows, providing flexibility through its Python-based framework. With its scalable architecture and user-friendly interface, Airflow simplifies the execution and monitoring of data pipelines, making it an essential tool for businesses handling large amounts of data.
Now that we have a foundational understanding of what Apache Airflow is and how it works, it’s time to get hands-on. In this section, we will guide you through the process of installing Apache Airflow on an Ubuntu system. This step-by-step guide will cover everything from setting up a virtual environment to configuring the necessary libraries and running Airflow services. Whether you’re a beginner or an experienced user, this guide will help you install Airflow efficiently and prepare it for production-level workflow management. Let’s get started!
Airflow Installation on Ubuntu
This setup is configured for the root user. However, it can be installed in any preferred directory or user environment.
- Since Airflow will be installed as the root user, the following command is executed:
sudo -i2. Install Python’s pip package manager:
sudo apt install python3-pip3. To create a virtual environment for the Airflow installation, download and install virtualenv:
sudo pip3 install virtualenv4. Create a directory where the Airflow environment will be set up and run:
mkdir airflow_workspace5. Navigate into the created directory:
cd airflow_workspace6. Create the environment within the airflow_workspace directory:
virtualenv airflow_env
You can confirm the environment has been successfully created by verifying that a directory named airflow_env has been generated within the airflow_workspace folder.
7. To activate the virtual environment, enter the following command:
source airflow_env/bin/activate

If you see (airflow_env) at the beginning of your command line, it indicates that you are now working inside the virtual environment. This can be confirmed by checking the prompt.
8. Install Apache Airflow along with the necessary libraries:
pip3 install apache-airflow[sentry,statsd]The command above installs the default Apache Airflow packages along with the sentry and statsd extensions. The sentry package is used for error tracking, while statsd is utilized for monitoring purposes.
Required Provider Libraries:
- SSH: This library is essential for establishing a connection between servers using SSH.
pip install apache-airflow-providers-ssh
https://airflow.apache.org/docs/apache-airflow-providers-ssh/stable/index.html
- MSSQL: This library is necessary for establishing a connection between the Airflow server and Microsoft SQL Server.
pip install apache-airflow-providers-microsoft-mssqlhttps://airflow.apache.org/docs/apache-airflow-providers-microsoft-mssql/stable/index.html
- ODBC: This library facilitates the connection between Airflow and Microsoft SQL Server using ODBC.
pip install apache-airflow-providers-odbchttps://airflow.apache.org/docs/apache-airflow-providers-odbc/stable/index.html
- PostgreSQL: This library is required to access Airflow’s metadata and establish a connection to PostgreSQL.
pip install apache-airflow-providers-postgreshttps://airflow.apache.org/docs/apache-airflow-providers-postgres/stable/index.html
9. Following the installation of the required libraries, the Airflow database will be initialized by executing the following command:
airflow db initNote: By default, Airflow uses an SQLite database. However, you may need to transition to a PostgreSQL database for enhanced functionality. Detailed information regarding the installation of PostgreSQL is provided in next part. After completing the steps outlined above, you can refer to that section for PostgreSQL installation instructions.

Upon successful execution, you will receive confirmation of the initialization, as shown in the figure. This indicates that SQLite is currently being utilized as the database, and additional changes will be required to transition to PostgreSQL.
10. Following the above steps, a directory named airflow will be created under the root user, as can be seen in the accompanying image.
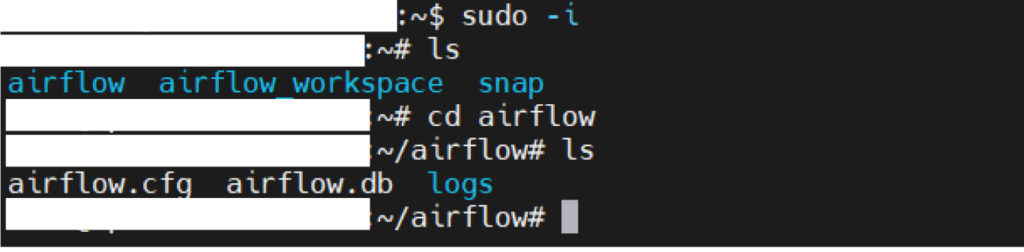
11. Within this directory, a subdirectory named dags will be created:
mkdir dags
The structure of the directory will appear as shown in the figure above.
12. It is necessary to create a user for Airflow, who will have access to the user interface and be able to perform operations within the Airflow environment. Ensure that you are within the virtual environment during this process.
Note: The information provided below is for demonstration purposes only. Please select a secure username and password.
airflow users create --username admin --firstname FIRST_NAME --lastname LAST_NAME --role Admin --email EMAIL_ADDRESS
After modifying and executing the command above, the user will be created, and you will be prompted to set a password.

Once the password is established, this step will be complete.
13. The Scheduler and Web Server can be started using the following commands on different terminals. Additionally, since both the Scheduler and Web Server need to run continuously, they should be set up to operate as services:
airflow scheduler
airflow webserver
14. You can connect to the Web Server using your IP address and port 8080. Log in with the username and password you created.

To wrap up this section, you’ve now set up Apache Airflow on Ubuntu, configured the necessary virtual environments, installed the required libraries, and set up the Scheduler and Web Server. In the next part, we’ll dive into how to replace the default SQLite database with PostgreSQL and change the executor to Local Executor for parallelism, improved scalability and performance. Stay tuned!